Sunday, May 31, 2015

Sunday Sketch

Hi everyone!  It's Sunday which means I have another amazing sketch to share with you :)

This sketch is fantastic to work with so I decided to throw another challenge into the mix by using a colour I typically shy away from - purple!  This month's add-on kit, Tropical Zest, is full of bold colours, including shades of purples and I really wanted to use them.  I actually really love purple/lavender as a colour but struggle using it on my layouts.

First up, here is the sketch:

11152697_10200281191388627_889731063453702715_n

And this is my take on it!  Changed slightly to fit my 6x8 format.  I used papers from the Add-on kit plus some extra's from the Main and Sprinkles kits.  Purples + Golds = LOVE! I think this kit really pushed me to finally get over my fear of using purples ;)


20150503_CTK May_ADD ON_Go_2

20150503_CTK May_ADD ON_Go_3

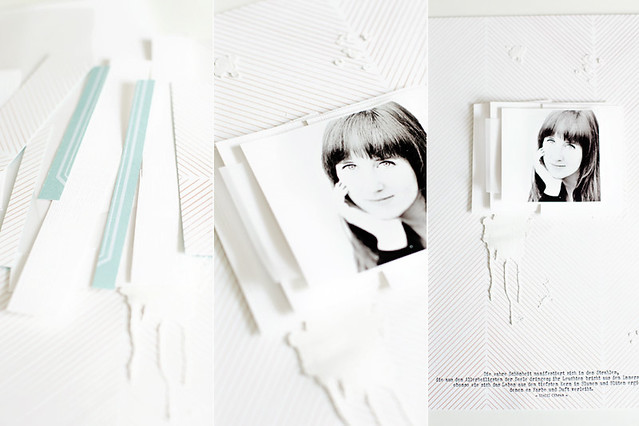
And I have a serious crush on that skinny washi tape from the Main kit this month.  I'm not overlay washi mad but this has managed to sneak its way onto a few pages (plus my planner) this month!

20150503_CTK May_ADD ON_Go_4

Now it's your turn to take on this week's sketch! We love to see what you do with our kits and sketches so please make sure to upload your projects to the Citrus Twist Gallery. And remember, by uploading your take on today's sketch to the gallery by June 6th, you will be entered to win a $5 Coupon to use on anything in the CTK Store! Remember to add "Sketch 31/5" to the title line!

Saturday, May 30, 2015

3 to Inspire with Trina

Hi everyone, it's Trina here today to share this week's 3 to Inspire challenge.

All you need to do is create a scrapbook layout, PL page or PL card using these 3 elements. I had lots of fun with this simple 6x8 Pocket Life page and was inspired by Chantal Philippe's crazy beautiful pattern paper alphabet letters. The thread I used is just frayed white fabric threads, bunched up and tucked under the puffy sticker. I used pieces of our June Pocket Life kit, Pattern Paper kits and the Embellishment kit. (June kits can be seen here beginning on June 2nd . . . or on May 31st beginning at 10 p.m. PST for our kit subscribers.)
  1. Use thread.
  2. Make your own alphabet letters from pattern paper.
  3. Use one photo with two layers behind it.

Here is my take on the challenge:


Here are my close-ups:


Now it's your turn! Use the three prompts to create your own projects and share them with us in the CTK Gallery and/or on our Facebook Fan Page. You can also upload to Instagram and tag us @citrustwistkits. Your take on this challenge must be uploaded by Saturday, June 6th, to earn a chance to win. When you play along, you will be entered to win a bit of happy mail from us. We will pick one lucky winner.

Thanks for visiting.

Friday, May 29, 2015

PL FRIDAY WITH AMELIE

Hello!

Here is Amelie with you today with a new PL spread. It is not exactly a new spread but the beginning of a little album for my son. I decided to do one for each of my son. Such great memories for them! I use to create these pages my May PL kit and Embellishment kit.


Now, some PL sketches to play with!
Thanks for visiting Pocket Life Friday, where every week we share PL sketches and a chance to win a piece of weekly fun mail. For your chance to win, create a layout based on the sketches in this blog post, post your layout to our Gallery or our Facebook Fan Page by Friday, June 5th. Be sure to include PL 5/29 in your title!
See you soon,
Amelie 

Thursday, May 28, 2015

June Kits Mood Board & Video Reveal

Hi, it's almost June and we are sharing Pocket Life and scrapbooking kit sneaks on the Citrus Twist Kits Fan Page on Facebook and also on Instagram. Today it's time for our mood board, too, created by lovely Design Girl Kasia.

The words we are hearing most about the June kits from the Design Team are "happy" and "bright."

Here you go!


Here is the June video reveal for those of you who love to see it in person:


Wednesday, May 27, 2015

Watercolour with Wax Paper

For as long as I can remember, I have wished to be able to create wonderful watercolour backgrounds as seen on the works of many of my scrappy peers. I was able to find quite a few neat techniques on Pinterest as well but nothing I was able to successfully replicate. 

I then decided to try something out with wax paper and I'll be sharing that technique with you all today.


What you'll need:

- Wax paper
- Paper towels
- Watercolour palette
- Water
- Paint brush (or watercolour brush as seen below but a size 8 or so regular paint brush works best)


Spread out your wax paper and add drops of watercolour here and there. 


Use a paper towel to dab away some of the watercolour off of the wax paper if you'd like some smaller/dotted areas on your paper or leave as is if your looking to get bigger concentrated watercolour areas (as seen bellow).

Grab your background paper and press it down onto the wax paper to transfer the watercolour over. You can either put all your desired colours at once on the wax paper or go at it one colour at a time by repeating all the steps with each colour.


Go ahead, try it out!

Chantal

Tuesday, May 26, 2015

Tuesday Tutorial with Janine

Hey everyone, Janine here today with a photo walk-through on how I created this layout using the wonderful and versatile May Kit. :)

janinelanger-tutorial-ctk-may2015-019

I wanted to create a layout with only gold, yellow, black and white as well as an interesting background that goes along with it. So I decided to finally use some modeling paste again.

janinelanger-tutorial-ctk-may2015-001

I really do love the way this turned out, just decide what stencil to use and play with modeling paste. It gives some structure to your background but it is not too distracting from the photo.

Next I grabbed some scraps that I had left from the kit and from the background paper as well as some white cardstock and vellum from my stash and layered everything behind the photo of my cute baby sister.

janinelanger-tutorial-ctk-may2015-002

On the photo on the right you can also see the effect the modeling paste gives. It's so great!

Then I added some splatters with my favorite black paint when it comes to adding splatters. You can either drop them directly from the pipette that comes with the bottle or if you want some smaller splatters you can use a small brush as I did here.

janinelanger-tutorial-ctk-may2015-003

To add some of the stamps of this month's stamp set (love them!) I used some black and yellow ink, stamped on some left over white cardstock and cut it out. Though I ended up using only one black stamp image on the bottom left of this layout, I didn't want to skip this step.

janinelanger-tutorial-ctk-may2015-004

I used a quote as journaling and I wanted to add some words to highlight it. So I cut out three words of a patterned paper that came with the Main kit and added them as well as the title using the chipboard alphabet.

janinelanger-tutorial-ctk-may2015-005

To emphasize it a bit more and to make sure it doesn't fall off I used my sewing machine to stitch over it.

janinelanger-tutorial-ctk-may2015-006

Last but not least I grabbed some embellishments from the Main and Sprinkles kit and added them here and there. I especially love those gold foil stickers, they make beautiful little accents!

janinelanger-tutorial-ctk-may2015-007

On the right picture you can see me sticking the top of one of the stamped images behind the photo. I cut it apart and used the black and white part for layering and I adhered the word stamp part on the bottom left of the layout.

And that's it for today, here you can see some close-ups of the finished layout:

janinelanger-tutorial-ctk-may2015-020

janinelanger-tutorial-ctk-may2015-021

janinelanger-tutorial-ctk-may2015-022

Thanks so much for stopping by and have a wonderful week! :)

Monday, May 25, 2015

I Capture with Michelle

I don't know about you, but I LOVE taking photos on my phone. The quality is great, the camera is always on hand, and there is an amazing amount of great apps out there to help you edit them. Today I want to share with you my "go-to" app-the app I use on a daily basis.

Pic-Tap-Go, an app created by the makers of Rad Lab, is definitely on the top of my list of photo-editing apps. I have tried several out, but I always come back to this one for these reasons-it's easy and quick. With Pic-Tap-Go I apply my filter(s), use the slider to adjust the opacity of each, and I hit save. The app is incredibly user friendly.

Untitled

When I said I use this on a daily basis, I meant it. I run almost all of my photos through it using the "Brightside" filter. This filter, as it's name suggests, brightens the photo, removing darkness and shadows, resulting in a more natural/real life looking photo. Here is an example:

Untitled

On the left, is the original photo. On the right, I applied the "Brightside" filter. You can see that the darkness, especially around the face area, is brighter and more natural looking. Here is another before-and-after using just the "Brightside" filter:

Untitled

The entire photo here is brightened, making for a more natural and cleaner photo, however I want to take it one filter further using the "Loft" filter at about a 60% opacity:

Untitled

I find that this particular filter really enhances a fair complexion and I use it often when I feel like doing a little bit more than just brightening the photo. 

Another way that I use this app, is to upload a photo to Instagram without cropping it into a square. This comes in particularly handy when I want to share my scrapbook layouts.

Untitled

I simply tap "Instagram-Full" and I am taken directly to Instagram. So simple and solves the problem of how to share a photo that is not a square ;). 

Wishing you a great week!

Michelle


Sunday, May 24, 2015

Sunday Sketch

Hello, Angie here to share this week's sketch challenge with you. First, here is your amazing sketch:


And here is my take on the sketch. I stuck pretty close to the sketch.  I love that you can use 6 pictures or change it up and add less pictures and some square papers.  Let your creative side kick in with this sketch. 

I used the May Main Kit and May Sprinkles Kit.


Are you inspired by this sketch? We love to see what you do with our kits and sketches, so please make sure to upload your projects to the Citrus Twist Gallery. And remember, if you upload your take to our Gallery by May 30th, you will be entered to win a $5 coupon to use on anything in the CTK store! Make sure to add "Sketch 5/24" to the title line when you upload. Have fun!

Saturday, May 23, 2015

3 to inspire with Diane

Diane here, with my first "3 to Inspire" challenge. You can find this challenge here every Saturday for those who need a little extra creative push to get scrapbooking, to keep scrapbooking or for those who just like a challenge! Your take on this challenge can be a layout or a PL spread and remember that you'll want to include all 3 prompts on your project.

Your prompts this week are:
1. Use 3 photos
2. Use 3 different patterned papers
3. Use 3 pieces of wood veneer

Here’s my take on this challenge using the May "Be Happy" PL kit and "Celebrate" Embellishment kit:


For my page I used 3 pieces of paper from the Pocket Pages kit and cut them down to 3x4 cards. I also used the wood veneer numbers from the kit to label my journalling. Keeping all my photos black and white doesn't compete with the more neutral color scheme.


Now it's your turn! Use the three prompts to create your own projects and share them with us here in the gallery and/or our Facebook Forum. You can also upload to Instagram, but remember to tag us @citrustwistkits. I can't wait to see what you come up with!